Monday, October 31, 2011

Happy Halloween!


via
I hope everyone will enjoy (or enjoyed) some super fun Halloween festivities.   We weren't  planning on getting dressed up this year because my little guy is still too young to trick-or-treat and we don't have a party or anything to go to, but then I realized that I would really regret not having a picture of him in a costume.

I  mean, just look at the picture I got last year when he was 8 months old.


He literally had that costume on for about 20 minutes, but I will love that picture forever.

I will be spending a good portion of my day today combing through a very picked over selection of costumes just so I can get a good picture.

Wish me luck!

Friday, October 28, 2011

Thrifty Inspiration: Thrift Store Finds + Paint

I haven't made any trips to thrift stores recently because the last time I made the rounds I came up completely empty handed....well, I guess not completely empty handed.  I did find the nightstand that I slip-covered at the Salvation Army down the street. 

That was kind of a fluke.  Usually, when I go thrifting I spend way more time driving around than I actually do in the stores.  Driving around wastes a lot of gas, and gas wasting seriously discourages frequent thrift store trips.  I think thrift stores should be located in a mall-like space so you only have to get out of your car once.  Who's with me?

These ladies have inspired me to give my local thrift stores another go.  They've had a bit more luck than I have and created some fabulous pieces with their finds. 

via
Brandi at Blue Cedar Lane has a great eye.  She bought a vase from Good Will and gave it a paint job that transformed it into a West Elm knock-off.

via
 Can you believe Dana at Crafted Niche paid $7.50 for that table?  Amazing!

via
Here's another thrifter with a great eye.  Jeniffer at Contemporary Harbor found this clock for $3 and painted it white.

Maybe I'll do some planning and plot out the shortest distance to a few thrift stores and hit 'em up this weekend to see what I can find!

Have a wonderful weekend!

Thursday, October 27, 2011

Booooooring


via

Not much is going on here.  I'm doing a lot of mundane house-keeping lately.  I've got loads of stuff that needs to be organized and sent to Good Will or sold on Craigslist...not very interesting, but necessary.

On top of that, I can't decide what to work on next.  I'm in a bit of a rut.  Hopefully my friend Pinterest will help me get out of said rut.

Y'all have a good Thursday!

p.s.  Did you see this yesterday?


Tuesday, October 25, 2011

I Need Birds!

via
I saw this yesterday via Pinterest.  I'm in love. 

I was thinking about putting black and white pictures in the frames next to my bed, but now I really want to find some colorful prints....free ones of course.


I'm currently scouring Graphics Fairy and Botaicus.org, but I haven't come across anything that I love yet.

Any tips on where to find free prints?

Monday, October 24, 2011

DIY Sunburst Mirror


When I started planning my sunburst mirror, my goal was to create one that was different from all the others out there.  I tried using different materials and different patterns, but I just couldn't come up with something that was going to be as inexpensive as the sunburst mirror from Centsational Girl.  So.....many trial and error sessions later....I basically ended up copying her sunburst.

Creativity FAIL, money saving WIN.  My mirror is a bit bigger than hers at 31 inches and I used a few different materials.  Here's a breakdown of what I used and what it cost:

- 12"x12" plywood board from Michael's:  $2.80 with coupon (regularly $3.99)
- Pack of wooden shims from Lowe's:  $3.50
- 8.5" framed circle mirror that I miraculously found at T.J.Maxx:  $7.99

Total:  about $15

The only big difference in my mirror and the one that I copied is the mirror itself.  I experimented with a few different ways to make the edges of a plain mirror look finished, and I had settled on using a painted embroidery hoop as a frame when I came across a framed mirror that was the perfect size in T.J. Maxx.  When I spotted it, it was like the sky opened up and angels were singing. 


Because my frame was a bit different, I placed the shims onto my board differently.  Instead of putting the mirror on the board first and just putting the shims up against the mirror, I traced the mirror onto the board and placed my shims about an eighth of an inch inside the circle so my mirror would rest on top of them.

The shorter shims are two inches shorter than the long ones.  The nice thing about using shims is that they're so thin at the bottom that you can just cut off the end with scissors.  No saw necessary.


Once I had the shims placed and glued, I used a bowl to weigh them down to make sure they were touching the board.

I attached the mirror to the board with wood glue on the edges and a big dollop of liquid nails in the center.

Another trial and error aspect of the mirror was figuring out what color it should be. 


I  only used paint that I already had and I settled on a color called Burnished Brandy by Sherwin Williams for the longer sticks and I used the same cream paint that I used on my trunk for the shorter sticks.

Here's the finished product once again:


It's not exactly original (I'm OK with that), but it fills that wall so nicely.  I'm really happy with the end product and the fact that it cost so little.
I'll be linking up to:


Friday, October 21, 2011

Happy Friday!


I'm skipping my regular "Thrifty Inspiration" post today because I spent most of my time yesterday trying to get a decent 20 months picture of my little guy.  Photographing a toddler is one of the most challenging and frustrating things I've ever done.  We spent 45 minutes at a park and I got about 3 shots that aren't terrible. 


When I wasn't chasing my son around with a camera or editing pictures I was working on my niece's birthday stuff.
Hopefully I'll have all the birthday stuff and my sunburst mirror finished by the end of the weekend!

Thursday, October 20, 2011

DIY Sunburst Inspiration


It's official! I'm jumping on the sunburst bandwagon!  I didn't find one tutorial that's exactly what I'm looking for, so I'm going to use pieces of different tutorials to make a mirror that will fit perfectly in our bedroom.

I even went out and bought a few supplies yesterday.


I'm kind of working by trial and error right now and I've already discovered that I need a smaller mirror.  Once I figure out what I'm doing I don't think the process will take quite as long as I thought it would. 

When I'm done my mirror should be 30" in diameter and cost between $15 and $20.

I'm really looking forward to getting started and sharing the process with y'all!

1.  Crafty Nest
2.  Momtastic
3.  Addicted 2 Decorating
4.  Third Floor Design Studio

Tuesday, October 18, 2011

Dead Ringer: RH Chelsea Column Lamp & Overstock Stately Crystal Table Lamp


Apparently Restoration Hardware is a really popular brand to knock-off.  Here's another RH look-alike with a much smaller price tag. 

via
Restoration Hardware Chelsea Column Table Lamp 30 1/2 inches tall $315.


via
Overstock Stately Crystal Table Lamp 31 inches tall $82.99.

Monday, October 17, 2011

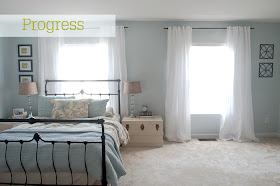
Master Bedroom Progress and Wishlist


Y'all are probably so tired of seeing this angle of my bedroom, but here it is again in it's most up to date state. 

Here's a quick rundown of the most recent changes:

I got my curtains lined and hung.  I finally found four Wal-Mart sheets to line my curtains, and I made a quick stop by Ikea on my way to D.C. last Wednesday to pick up another $7.99 curtain rod to match the one that I already had.  Where else can you get an "83 curtain rod for that cheap?

I hung some $3 Wal-Mart frames that I already owned on the left side of the bed and I recovered my lamp shades in a darker burlap.  I used a coupon to Hancock Fabrics and it only cost $4. 


I think the natural burlap looks so much better than the bleached.  Once again, here's the tutorial I used. 

Ok, now on to the wishlist portion of this post...please do not laugh at my attempt to use Photoshop...or whatever...go ahead and laugh.  It's pretty ridiculous.


Filling the frames is going to be pretty easy once I decide what's going to go in them.  I'll probably do some more free botanicals.

There are some amazing DIY sunburst mirror tutorials out there and I plan on copying one of them.  This project shouldn't cost that much money, but all the tutorials I've seen seem to be pretty time consuming.  (The mirror I Photoshopped into the picture is from Ballard designs and it's $529 and humongous.)

The biggest obstacle to getting our master bedroom "finished" is that "super cheap" chair.  The one in the picture is actually from Pottery Barn.  I just wanted to get a sense of what a chair would look like in that corner.  I will probably be scouring Craigslist for months before I find anything that will work or that would be worth trying to transform. 

Also, this is just one side of our bedroom.  I'll probably get to work tackling the office area and the wall opposite our bed long before I find a chair to go in that corner.

So there you have it!  Progress and plans all in one post.

Hey There!

via
Please excuse my absence on Thursday and Friday.  I made a quick trip to the D.C. area to visit with a very special 5 week old and his mommy. 

I left a bit earlier than I had originally planned and didn't get a chance to complete posts for the two days I was out of town.  Oh well!

Hope y'all had a wonderful Fall weekend!  I'll post again later today with an update on the progress of our master bedroom.

Also...thanks to Kim at A Girl and A Glue Gun for giving my fall leaf initial a shout out!


Wednesday, October 12, 2011

Easy DIY Fall Wreath


I've got another quick and easy fall project for you!  I finally put a wreath on my door!  I kept it pretty simple just like my mantel, but unlike the neutral fall decor in my house, I went with more traditional fall colors for my wreath.  The reds and orange-y yellows look fantastic on my brown door, but they would not look so good with the color palette of my living room.

I had all the materials on hand, so I didn't spend a dime to make this wreath, but if I had spent money on it, it would have only been about $10. 

I used a plain grapevine wreath from Michael's and a couple garlands of faux berries and dried leaves that I also got from Michael's.  I attached the berries with floral wire and stuck the leaves on with hot glue.  So easy!


Have a great Wednesday!

I'll be linking up to:


Monday, October 10, 2011

$7 Quick and Easy Fall Mantel


OK.  I'm so far behind the curve on this, but I figured better late than never, right?  I decided to do a little fall decorating on my "mantel" (two wall mounted shelves over our TV) when I came across a couple of free and very cheap projects last week.  I posted about them here last Friday. 

Most of the stuff that was on the mantel stayed, I just made a few minor tweaks.  I broke out the birch candles and brought in some sticks that I striped the leaves off of to replace the white flowers I had in the tall vase.  I also put a strip of burlap around the vase. 

Here's the whole mantel:


The only things I had to spend money on were the corn husks and the pumpkin on the left.  It came from the dollar store and I painted it white.

As you can see, I kept things pretty simple, but it satisfied the itch I had for doing a little seasonal decorating.


My weekend was so full that I didn't get a chance to get any decorating projects finished.  I'm completing some fall decor and I'll hopefully have it posted by this afternoon.

Hope everyone had a great weekend!

Friday, October 7, 2011

Thrifty Inspiration: Fall Decor


I've already mentioned this once this week, but I don't really have any fall decorations up because all of my hard earned Craigslist dollars are going towards more permanent items for my home.  Thank goodness these ladies posted some incredible and practically free fall decorating projects this week.  I may have to copy a few of them this weekend.

via
Amanda at Girl in Pink made this lovely fall leaf garland from book pages.

via
Erin at Stumbling Tongues made this adorable book page pumpkin.

via
Courtney at A Diamond in the Stuff covered dollar store pumpkins with book pages.

via
How cute are these corn husk pom-poms fro Centsational Girl?!

In other news that's completely unrelated to fall decor:  I have three of the four Wal-Mart sheets I need to line the Ikea curtains in my bedroom.  Woo hoo!  I'm hoping to have plenty to share next week.

Y'all have a great weekend!

Wednesday, October 5, 2011

Completely Custom and Thanks!


Hope everyone is having a great Wednesday!  I have a few random things to share today so here they are in no particular order....

I'd love to create a custom print for you if you don't see a particular design or the colors you need among those available in my Etsy shop.  I've had customers request custom graphics and color schemes and I'm happy to oblige. 

I created this dragonfly graphic for a customer...
...and this neutral color palette.


Ashley requested a print of a quote that she loved and gave me a picture of her little boy's bedding.  Here's the print I designed for her son's nursery.
I know how important it is to find just the right thing to hang on a wall and I'd be happy to create it for you.
I've started designing paper wares for birthday parties.  The first one I'm doing is for my niece and as soon as I have all the pieces put together, I'll make it available in my Etsy shop.  Here's a little peek at the not-quite-finished invitation.

Thanks to Chic & Cheap Nursery for featuring my son's room yesterday!

via

The site is packed full of great, budget friendly nursery ideas, so head on over there if you're looking for a little inspiration.